
Hello, pumpkins! Ashley here from Vacation Script, where we talk about all things travel — and sometimes the art of beautiful script. So today, we’re diving into how to make a doormat that’s not only functional but personal, with a custom phrase that will greet guests with some personal flair. Ready to get started? I promise it’s easier than you think, and who knows, maybe this new skill can even help fund your next trip through a few DIY sales!
Supplies You’ll Need:
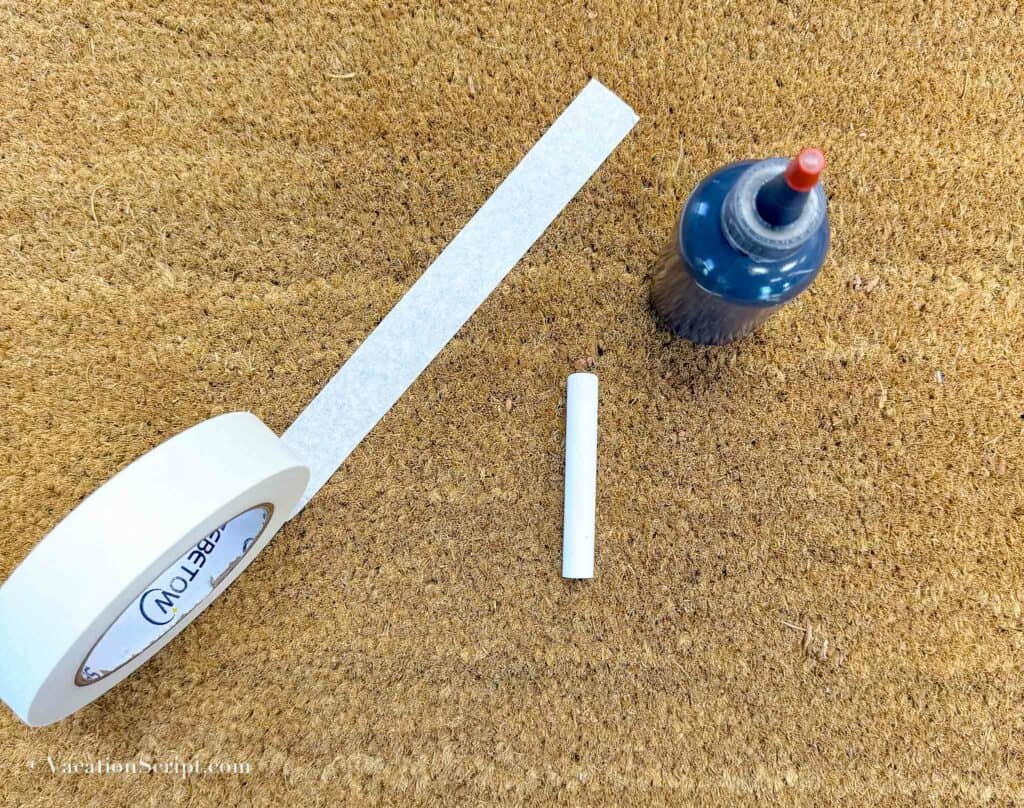
- Tape (masking or painter’s tape)
- Doormat (a coir mat is preferred)
- Outdoor Paint (a good-quality acrylic or latex)
- Squeeze Bottle with Tip (for controlled painting)
- Chalk (easy to draw and erase lines)
- Kleenex (it can get a little messy)
- Under Doormat Rug (totally optional but very cute)
Why You’re in Good Hands with This Guide
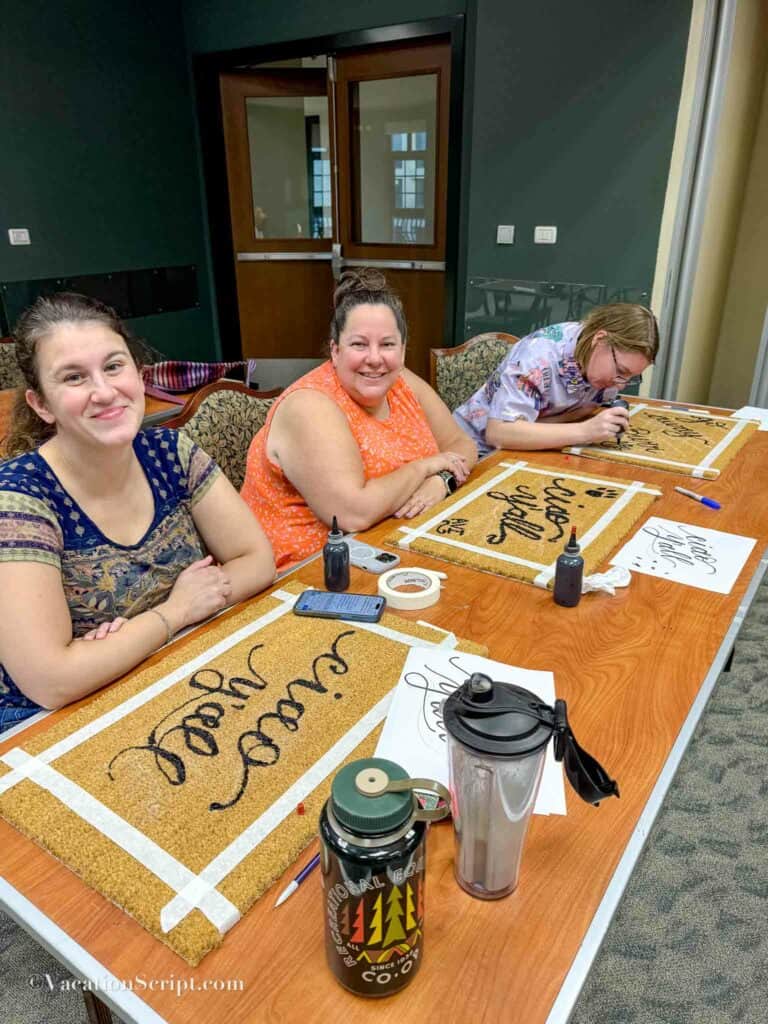
Since 2012, I’ve been practicing calligraphy and hand lettering, and since 2018, I’ve had the privilege of teaching these techniques to others. I recently hosted a class on how to make a doormat, and everyone had a blast creating their own custom designs! Nothing compares to the satisfaction of seeing a personalized creation greeting you each day — and today, I’ll walk you through this step-by-step. Whether you’re crafting for your own front door or planning to give these out as custom holiday gifts, this how to make a doormat tutorial is designed to be easy and fun.

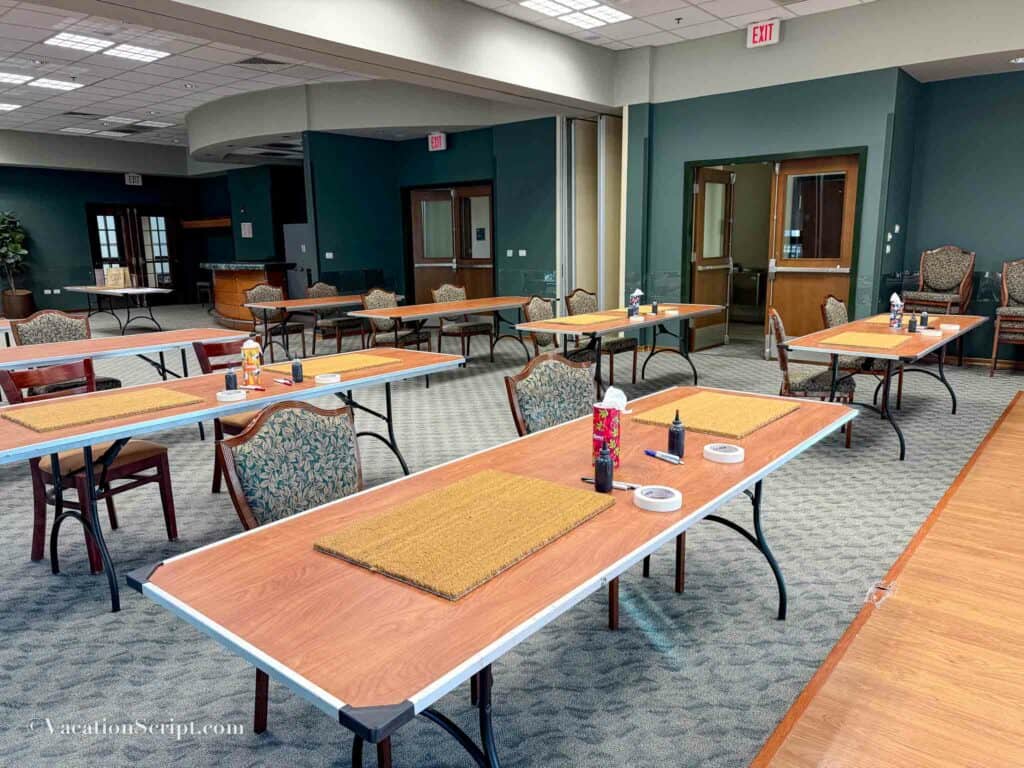
Step 1: Set Up Your Workspace
Pro Tip: Start with a Clean, Clear Workspace
Place your doormat in front of you, and tape a 1–2 inch frame around all four sides. This border is key for two reasons:
- It keeps your lettering from running off the edges, which makes for a cleaner, more professional look.
- It helps define the workspace, giving your design that “subtle polish” that makes it look finished, similar to how a photo looks in a frame with the matting around it.
Of course, if your chosen phrase or design goes edge-to-edge, feel free to skip this border, but I recommend starting here for first-timers.
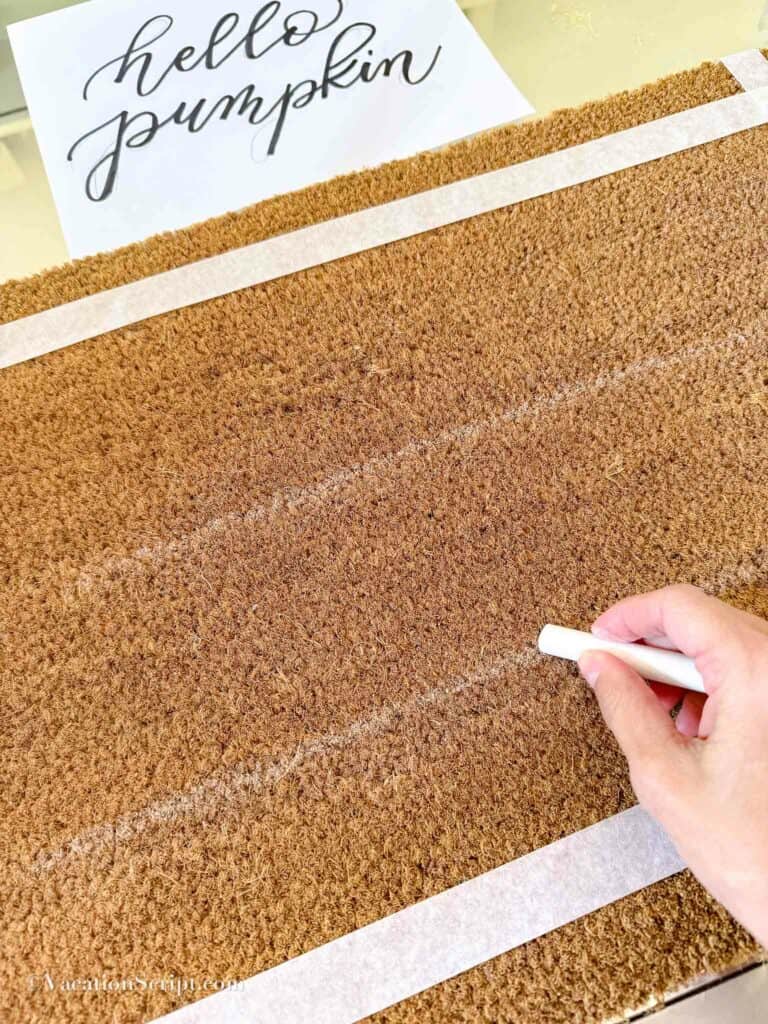
Step 2: Draw a Baseline – It Will Save You!
Using chalk, lightly sketch a horizontal line to guide your text. This step is essential in how to make a doormat that looks polished and professional. You can even get creative and place this line diagonally for a bit of flair! But trust me, without a guideline, your letters might start on the right foot and end up on a downward slope. Been there, done that. The baseline is your friend!
Step 3: Choose and Sketch Your Phrase
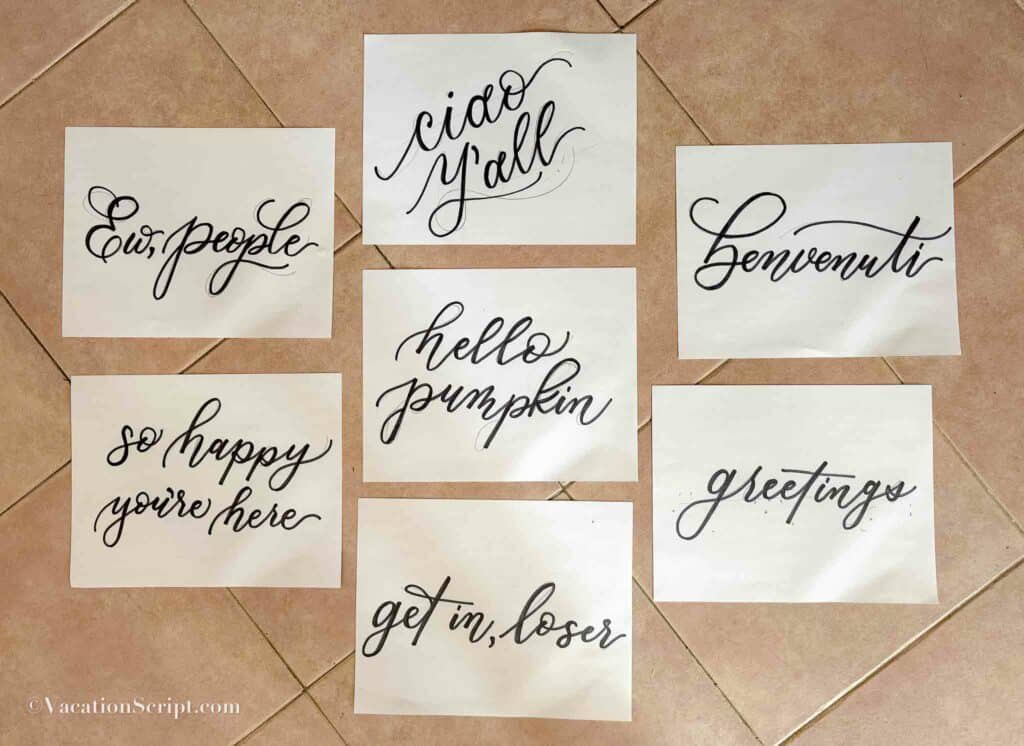
Got writer’s block? I have compiled a freebie download list of doormat wording options for you to choose from at the bottom of this post. Here are a few of my favorites:
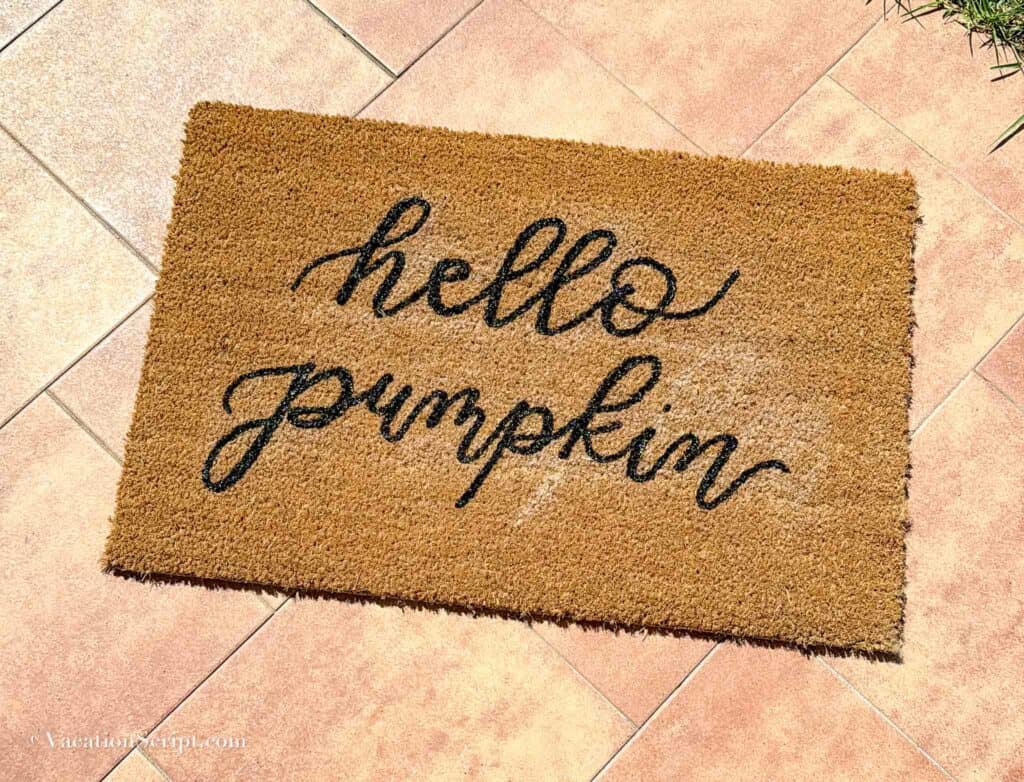
- “Hello, Pumpkin” (a fall classic)
- “Welcome-ish” (depends on who you are…)
- “Yay, You’re Here!” (for your favorite guests)
- “Just Keep Knocking” (for a touch of mystery)
- “Please Hide Packages from Husband” (a modern essential)
Once you’ve chosen your phrase, write it out in chalk. You could practice on scratch paper first to warm up your hand and perfect your style. Remember, the chalk is a guide, not the final product, so don’t worry if it’s a bit faint or uneven — we’re going for a mapped out guideline here. Make sure your wording is centered and doesn’t run into the words nearby. If you made a mistake here, simply wipe the chalk with a wet Kleenex and redo it.
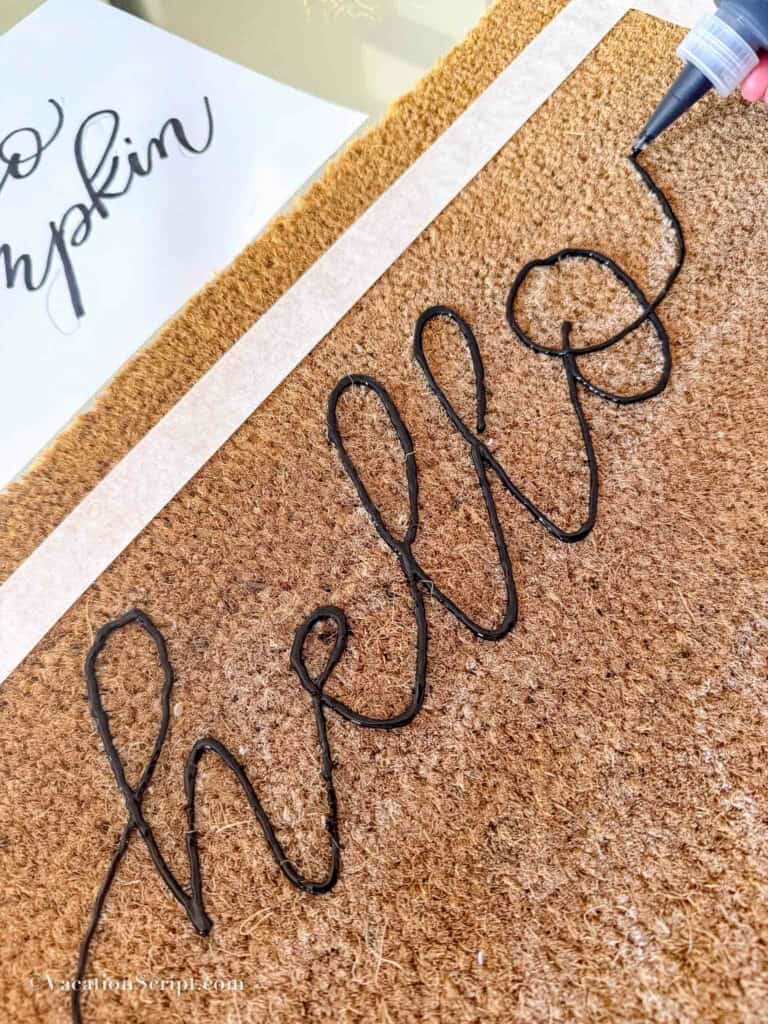
Step 4: Start Painting with Control
Now for the fun part! Take your squeeze bottle filled with outdoor paint, hold it close to the doormat, and gently start tracing your chalk lines. Pro tip: don’t touch the mat with the bottle tip — it’s all about controlled flow. Hover above it slightly, so your hand moves freely as you go.
Mistakes happen, so don’t stress if it’s not perfect. You can salvage small goofs in the next step. And remember to focus on one word at a time so that you’re not accidentally smudging fresh paint with your hand.
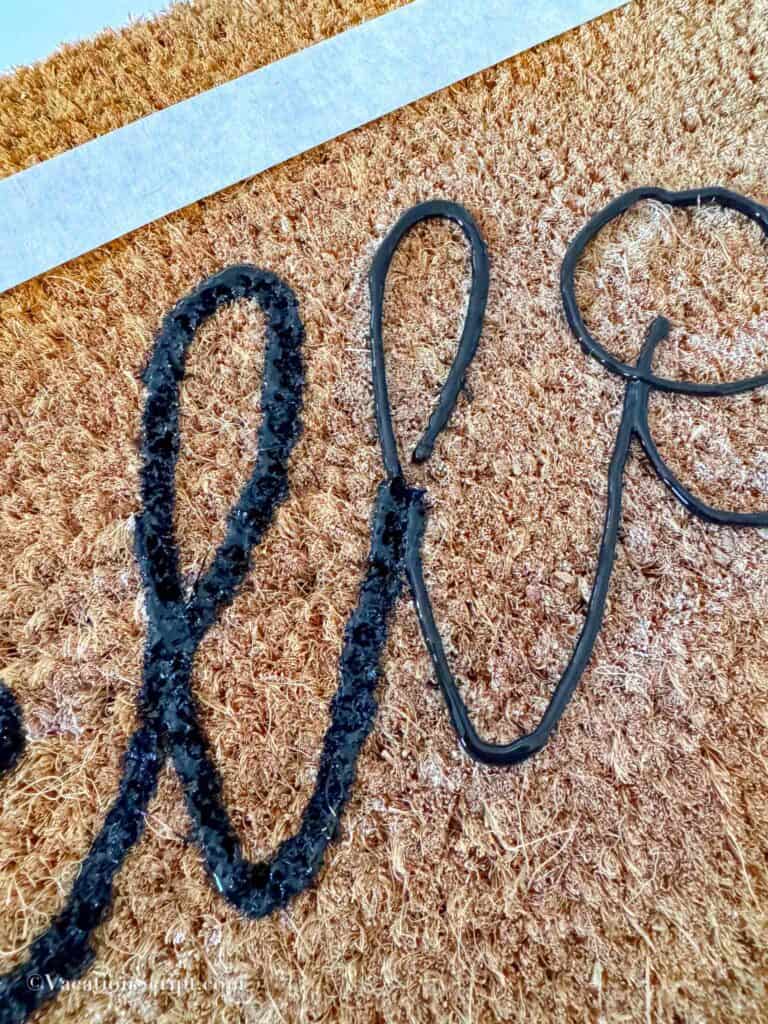
Step 5: Get the Thick and Thin Right
Next you will push the paint deeper into the doormat with the paint tip. You can fix any lines that aren’t smooth here. Once complete you make the downstrokes thicker. In calligraphy, downstrokes (when your hand moves down) are thicker than upstrokes (when your hand moves up). Think of the letter V: the first diagonal down should be thicker than the upward stroke that finishes it.
To get this effect, add an extra line of paint on all your downstrokes. Just go back over those spots with a steady hand, and then press the paint deeper into the mat for a bold, consistent finish. This technique takes your doormat from “cute” to “crafted by a pro.”
Step 6: Repeat for Each Word
Repeat steps 4 & 5 for each word; the technique of outlining, adding downstrokes, and pressing the paint in. A word of advice: Don’t rush this step! Even if you’re eager to see the finished product, taking your time here will pay off with a beautifully done design.
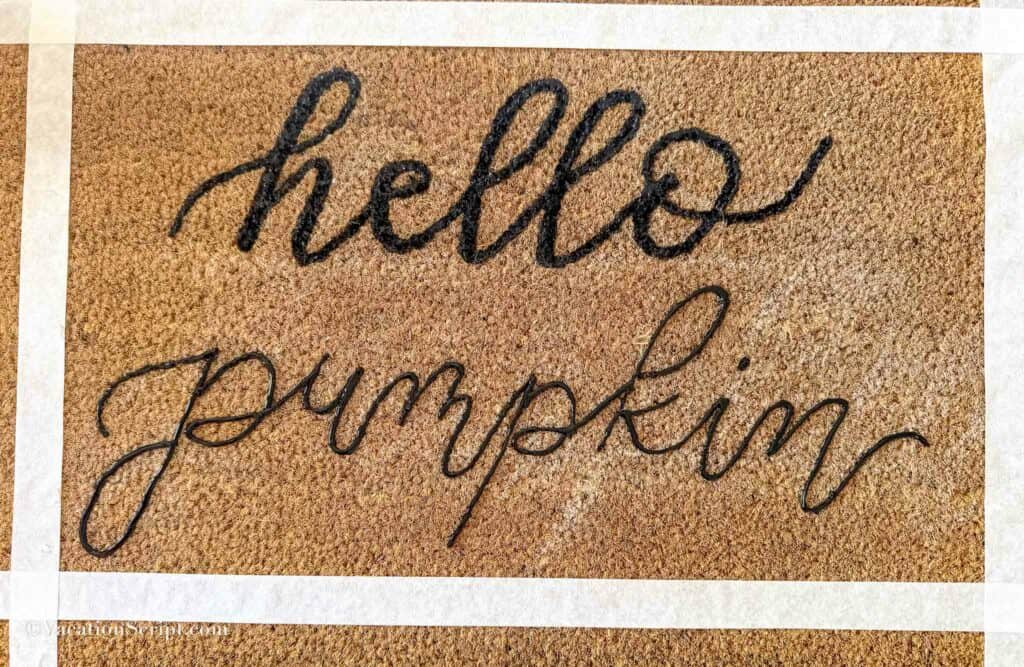
Step 7: The Big Reveal
Once you’ve painted all your words, let the paint sit for a moment while you peel away the tape frame. This is my favorite part — that satisfying peel where the whole design feels “complete.” If you’re in a creative mood, you can add extra borders or embellishments to the corners for a little extra.
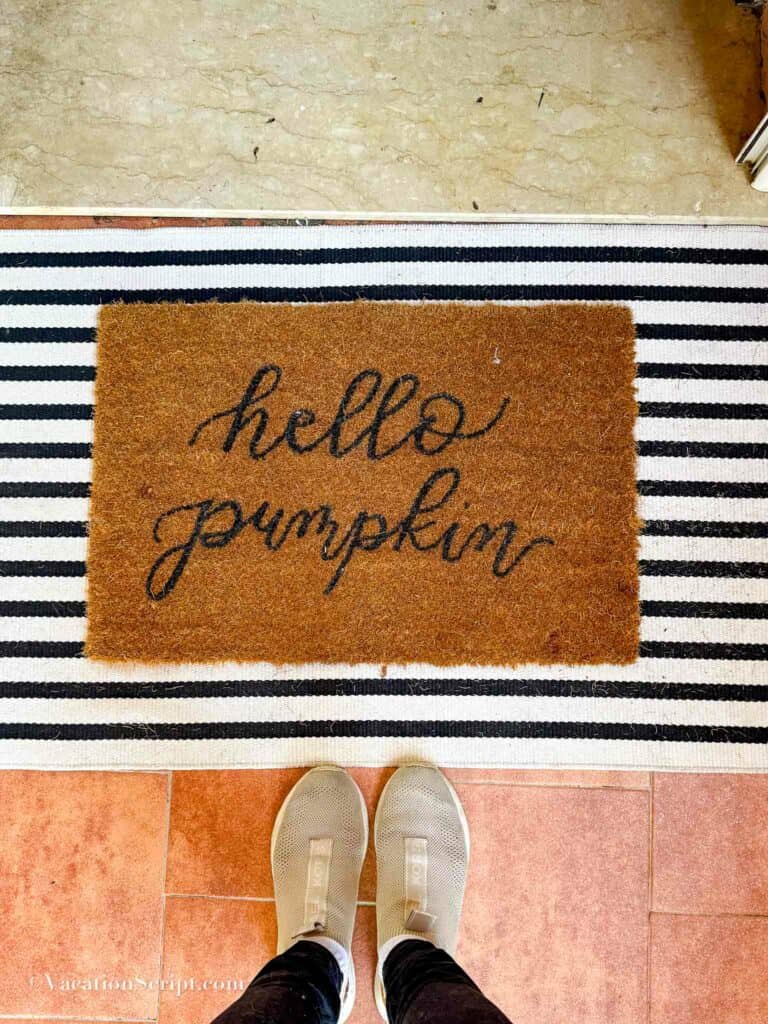
Step 8: Let it Dry
Move your doormat to a sunny spot, letting it dry for at least two hours. Afterward, hose it down to wash away any leftover chalk, and you’re all set!
Some Tips for Long-Lasting Results
- Choose Quality Paint: Investing in outdoor-specific paint pays off in longevity.
- Take Your Time with the Lettering: The squeeze bottle may take a few tries to get used to, but once you do, you’ll feel like a pro. Make sure the paint is at the tip so air bubbles to burst out causing splatter.
- Plan to Rotate Designs Seasonally: Make a few doormats to swap out with the seasons. They’re easy to make and even easier to switch up!
Final Thoughts on How to Make a Doormat That’s All You
Congratulations! You’ve made a custom doormat that not only looks great but speaks your unique style. I hope you had as much fun with this project as I did teaching it. I’m giving these out as holiday gifts this year, and if you love creating, I recommend doing the same. Everyone appreciates a one-of-a-kind item, and this is a thoughtful way to show your creativity.
Bonus: Need Some Inspiration?
Here’s a downloadable list of 40+ ideas, from humorous to heartwarming, that can make any guest smile (or chuckle) before they even ring the bell. It’s the small things that make a big impact!
Whether you’re decorating for the season, adding some personality to your porch, or just looking for a fun DIY project, now you know how to make a doormat that’s truly one-of-a-kind.